Integrations
You can add third-party integrations like Google Analytics and Web Monetization Payment to your blog.
We currently support:
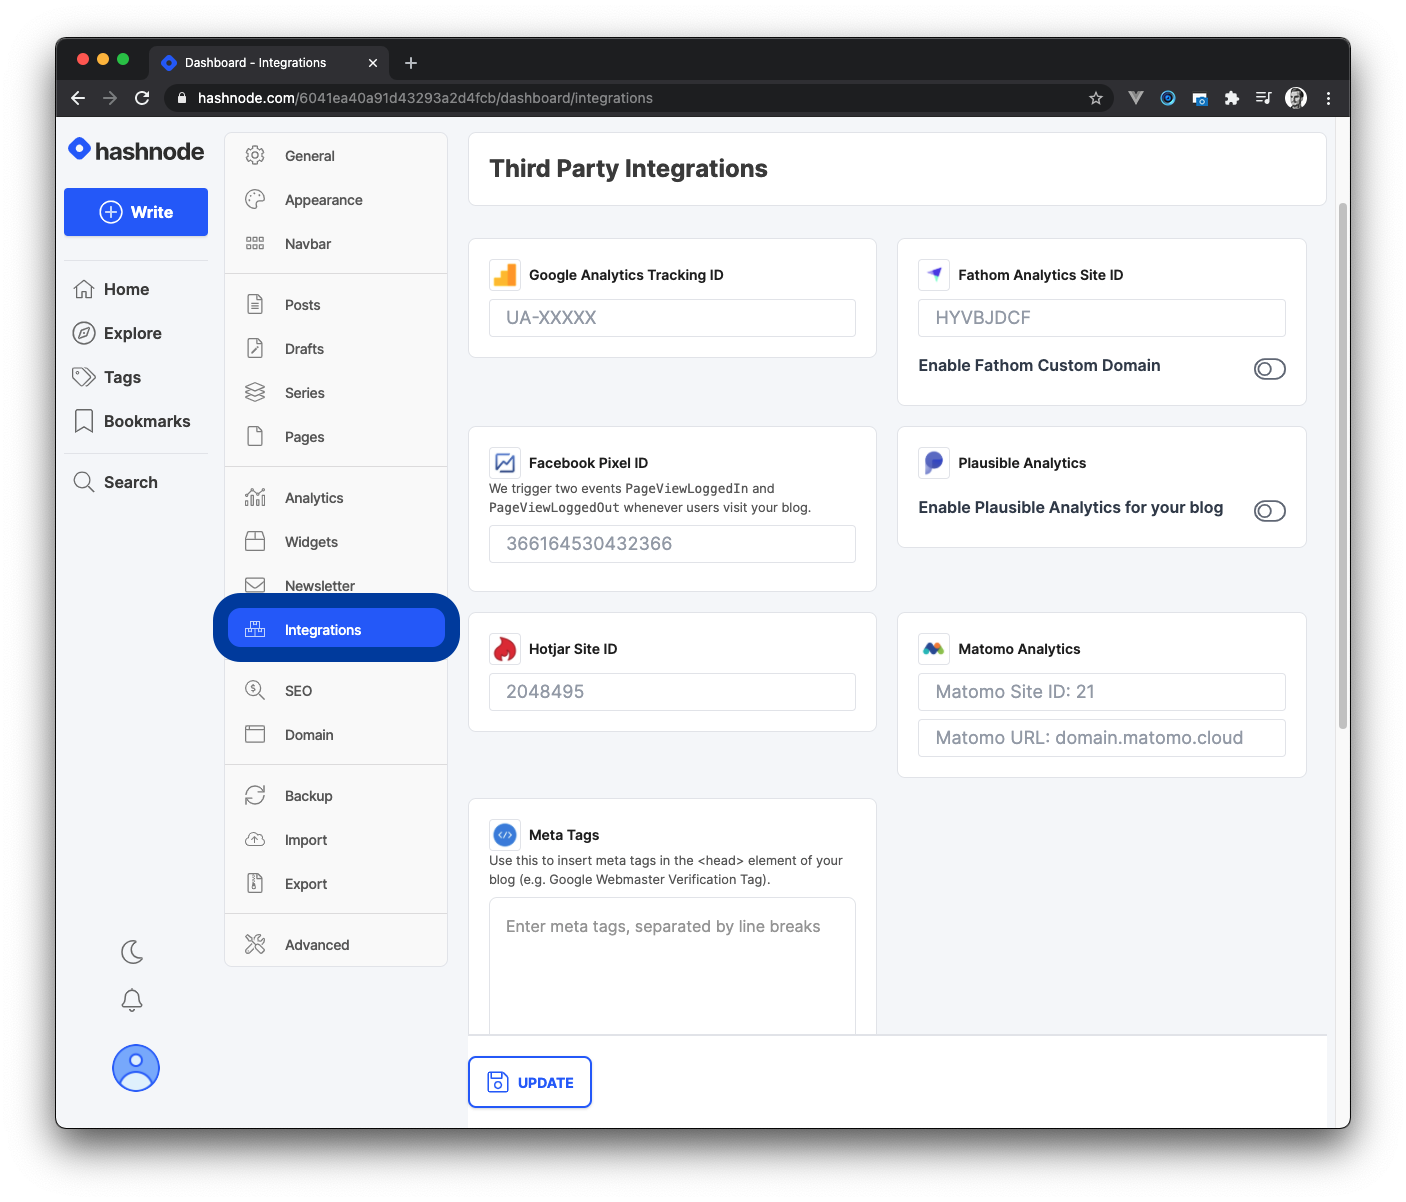
- Google Analytics Tracking ID
- Fathom Analytics Site ID
- Facebook Pixel ID
- Plausible Analytics
- Hotjar Site ID
- Matomo Analytics
- Meta Tags
- Web Monetization Payment Pointer
Here is how to add a third-party integration to your blog:
- Log in to your Hashnode account.
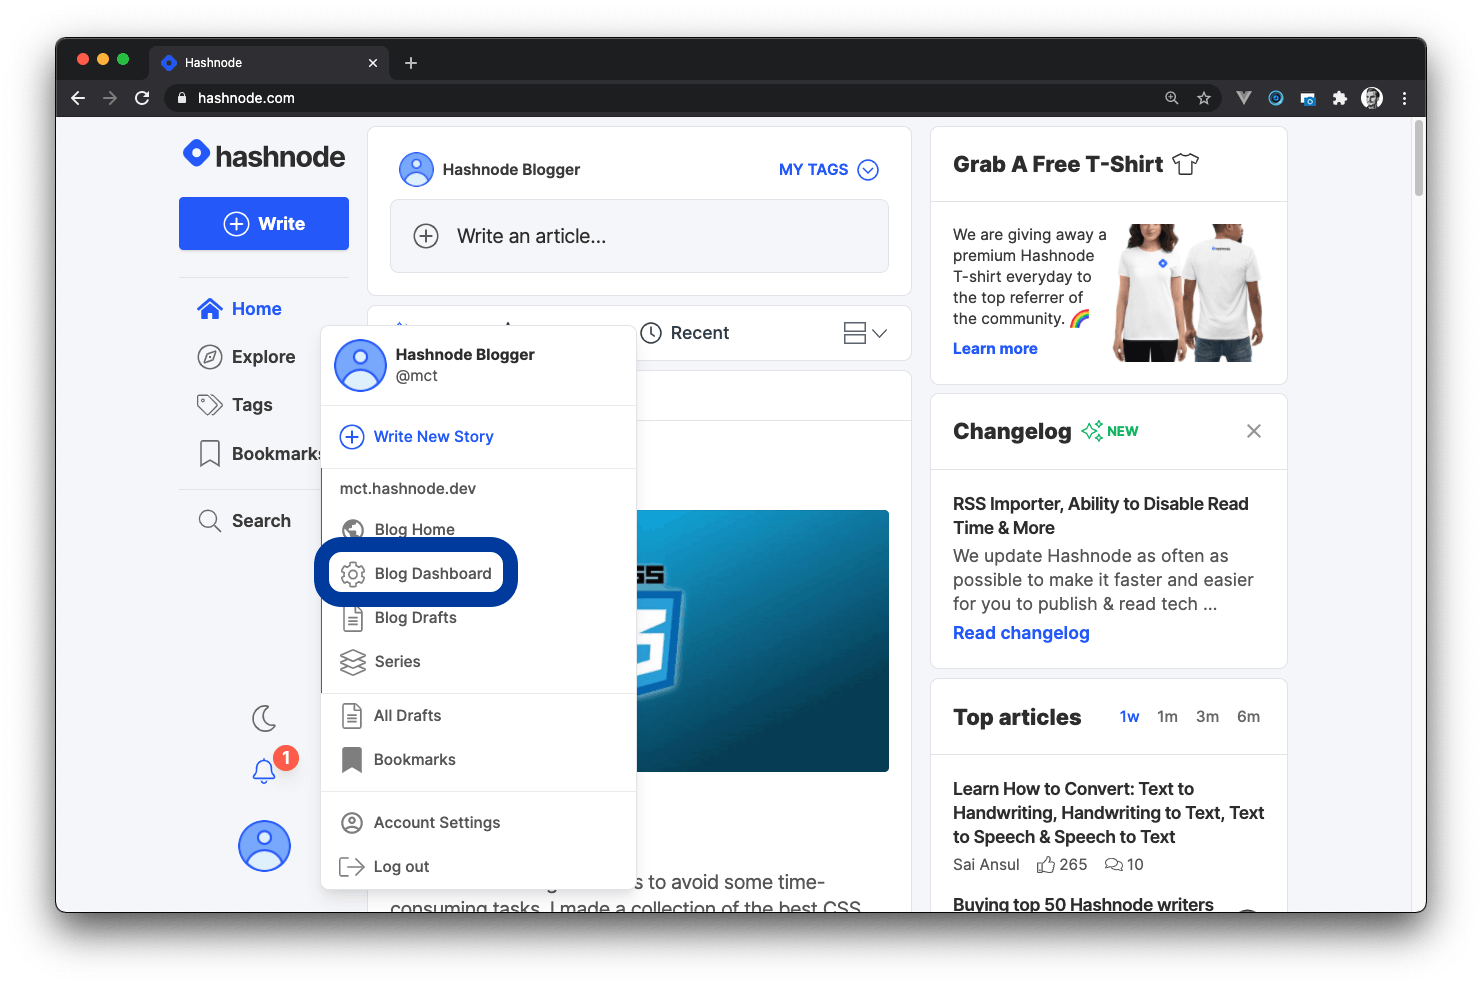
- Click on your profile picture at the bottom-left corner of the page on desktop screen or top-right corner on mobile screen.
- Click on the Blog Dashboard option from the popup modal to access your blog's dashboard.
- Click on the Integrations tab, find the service you want to integrate, paste the embed code in the field provided, and click the Update button to save your changes.
Google Analytics
- Create or sign in to your Analytics account.
- Set up a property in your Analytics account.
- Copy your tracking ID (Looks like UA-123456789-0).
- Head to the INTEGRATIONS tab in your blog's dashboard.
- Paste the tracking ID in the Google Analytics Tracking ID input field.
- Click the Update button to save your changes.
Facebook Pixel
- Create a Facebook account.
- Add a new data source.
- Create a Facebook pixel.
- Copy your Facebook Pixel ID (Looks like 377164589436266).
- Head to the INTEGRATIONS tab in your blog's dashboard
- Paste the Pixel ID in the Facebook Pixel ID input field.
Plausible Analytics
- Create a Plausible account.
- Once you have an account, you can enter the domain name of your Hashnode blog. Please, remove
httpsandwwwfrom the URL and add only the hostnameyourdomain.com. - Go to your blog's dashboard on Hashnode.
- Navigate to the Plausible Analytics section in the INTEGRATIONS tab.
- Click on the toggle button to enable Plausible Analytics on your blog.
- Click on the Update button to complete the process.
Hotjar Site ID
- Create a Hotjar account.
- Click on the Install on your platform tab.
- Copy your Site ID.
- Head over to the INTEGRATIONS tab and add your Site ID to the Hotjar Site ID input field.
- Click on the Update button to save your changes.
- Go back to Hotjar's website and enter the URL of your Hashnode blog.
- Click on the Verity Installation button to complete the process.
Matomo Analytics
- Create a Matomo Analytics account.
- Copy your Matomo Site ID and Matomo URL.
- Go to your Hashnode blog dashboard.
- Click on the INTEGRATIONS tab and navigate to the Matomo Analytics section.
- Add your Matomo Site ID and URL into the input fields.
- Click on the Update button to save your changes.
Fathom Analytics Site ID
- Create a Fathom account.
- Add a new site in your settings.
- Copy your Site ID (Looks like HUVBAGGT).
- Head to the INTEGRATIONS tab in your blog's dashboard
- Paste the Site ID in the Fathom Analytics Site ID input field.
- Click on the Update button to save your changes.
Meta Tags
- Use this to insert meta tags in the
<head>element of your blog (e.g., Google Webmaster Verification Tag). - Head to the INTEGRATIONS tab in your blog's dashboard
- Paste the meta tag in the Meta Tags input field.
Web Monetization Payment Pointer
- Use this to insert your payment pointer in the
<head>element of all pages on your blog. - Learn what web monetization is and how it works here.
- Set up a web monetized receiver (digital wallet) for receiving payments.
- Copy your payment pointer (Looks like $ilp.uphold.com/Px2krEJk7GWQ).
- Head to the INTEGRATIONS tab in your blog's dashboard
- Paste the meta tag in the Web Monetization Payment Pointer input field.